There’s little more frustrating than a fan stuck on its highest setting, blasting air when all you need is a gentle breeze. If your electric fan has decided that “high” is the only speed that matters, you’re not alone. This is a common issue that can affect various types of fans, from ceiling fans to standing models, and often indicates a specific underlying electrical problem. With over a decade of hands-on experience in electric fan mechanics, I’m here to guide you through diagnosing and fixing this persistent issue, helping you restore full control over your comfort.
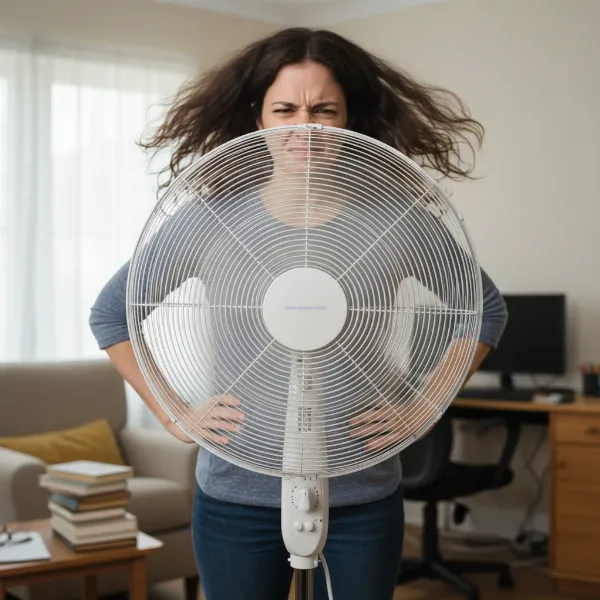 Person looking frustrated at an electric fan stuck on high speed.
Understanding Why Your Fan Only Works on High Speed
To grasp why your fan might be stuck on high speed, it helps to understand how fans regulate their speed in the first place. Most electric fans, particularly those with multiple speed settings, rely on components like capacitors or speed control resistors to manage the electrical current flowing to the motor. These components essentially “step down” the voltage for lower speeds.
When a fan only operates on high, it usually means the electrical path for lower speeds has been interrupted or compromised. The highest speed setting often bypasses these regulating components, sending the maximum available voltage directly to the motor. Therefore, if the components responsible for reducing voltage at lower settings fail, only the high-speed circuit remains functional. The most common culprits include a faulty speed control resistor, a damaged capacitor, or issues with the wiring.
Identifying the Root Cause: Troubleshooting Steps
Before you grab any tools, a systematic approach to troubleshooting can help pinpoint the exact problem. Always ensure the fan is unplugged or the circuit breaker is off before performing any physical inspections.
Check the Speed Control Switch
For many fans, especially table, pedestal, or box fans, the speed is controlled by a rotary switch or push buttons. For ceiling fans, it might be a pull chain or a wall switch.
- Physical Inspection: Examine the switch for any visible signs of damage, such as cracks, burnt marks, or looseness. If it’s a pull chain, ensure it engages correctly with each pull.
- Feel for Resistance: When turning a rotary switch or pressing buttons, you should feel distinct clicks or resistance for each speed setting. A mushy or inconsistent feel might suggest an internal switch problem.
- For Wall Controls: If your ceiling fan uses a wall-mounted speed control, check if it feels loose or if the dimmer slide (if applicable) moves smoothly.
|
Our Picks for the Best Electric Fan in 2026
As an Amazon Associate I earn from qualifying purchases.
|
||
| Num | Product | Action |
|---|---|---|
| 1 | Viniper Portable Rechargeable Fan, Small Desk Fan : 3 Speeds & about 8-24 Hours Longer Working, 180 Rotation, Portable Desktop Fan Small but Mighty, Strong Wind (White, Light Black Blade)6.2 Inch |

|
| 2 | XPOWER FC-100S Multipurpose 11 Pro Air Circulator Utility Fan with Oscillating Feature |
|
| 3 | 10" Modern Standing Fan for Bedroom, Sleek Oscillating Pedestal Fan, 3-Speed & Height Adjustable Compact Floor Fan for Home Office & Dorm |
|
| 4 | Amazon Basics Air Circulator Fan, Desk Fan for Bedroom, Home and Office, With 90-Degree Tilt Head, 3 Speed Settings, Lightweight (3 LBS), 35 Watts, Black, 11.1"W x 6.3"D x 10.9"H |
|
| 5 | Dreo Tower Fan for Bedroom, 25ft/s Velocity Quiet Floor Fan, 90° Oscillating Fans for Indoors with 4 Speeds, 4 Modes, 8H Timer, Standing Fans, Bladeless Fan, Black, Nomad One (DR-HTF007) |
|
| 6 | Amazon Basics 16" Pedestal Fan with Remote, Floor Fan, Standing Fan for Bedroom, Living Room, Office, with 3 Speeds, 3 Modes, Timer, Dual-Layered Blades, Adjustable Height, Tilt Head, 60W, Black |
|
| 7 | Lasko 2520 Oscillating Stand Fan,White 16 Inch |
|
| 8 | Dreo Fan for Bedroom, 120° Oscillating Standing Fans, Quiet Floor Fan with DC Motor, 100ft Pedestal Fans for Room, 9 Speeds, 4 modes, 20dB, 120° Manual Vertical, 37-42" Adjustable Height, 9H Timer |
|
| 9 | Dreo Fan for Bedroom, 120° Oscillating Standing Fan, Quiet Floor Fan with DC Motor, Pedestal Fan for Room, 9 Speeds, 4 modes, 20dB, 120° Manual Vertical, 37-42" Adjustable Height, 9H Timer, Black |
|
| 10 | LEVOIT Tower Fan for Bedroom, 25ft/s Velocity Standing Fan with 28dB Quiet for Sleep, Remoter, 12H Timer, 5 Speeds, 4 Modes, 90° Oscillation for Home, Office, Indoor, Bladeless 36 inch, White |
|
Inspect the Capacitor
The capacitor is a vital component in many AC motors, especially in ceiling fans, helping to start the motor and maintain different speeds by storing and releasing electrical energy. A failing capacitor is a very common reason for a fan running only on high speed or not starting at all.
- Location: In ceiling fans, the capacitor is typically located in the motor housing, often near the speed control switch or wiring. For other fans, it might be integrated into the motor assembly or control panel.
- Visual Cues: Carefully inspect the capacitor for physical damage. Look for any bulging, leaking fluid, or scorch marks. These are clear indicators of failure.
- Testing (Advanced): If you have a multimeter with a capacitance testing function, you can test the capacitor for its rated microfarad (µF) value. However, this requires careful handling and discharge of the capacitor, as it can store a dangerous electrical charge.
Examine Wiring Connections
Loose or corroded wiring can disrupt the electrical flow to specific speed settings, leading to intermittent operation or failure of lower speeds.
- Power Disconnection: Absolutely ensure the fan is unplugged or the circuit breaker is off before touching any wires.
- Visual Inspection: Open up the fan’s base or canopy (for ceiling fans) to access the wiring. Look for any wires that appear loose, frayed, cut, or corroded.
- Secure Connections: Gently tug on each wire connected to the switch, capacitor, and motor to ensure they are securely fastened. Re-seat any loose connections.
Evaluate Remote Control and Receiver (If Applicable)
If your fan uses a remote control, the issue might lie with the remote or its receiver unit inside the fan.
- Batteries: Start with the simplest fix: replace the remote’s batteries.
- Reset: Many fan remotes and receivers can be reset. Consult your fan’s manual for specific instructions, which often involve flipping the circuit breaker or pressing certain button combinations.
- Receiver Unit: The receiver unit in the fan itself can fail. If the remote works but the fan still misbehaves, the receiver might need replacement.
Step-by-Step Guide to Repairing Your Fan
Once you’ve identified the likely cause, it’s time to consider the repair. Remember, electrical work requires caution. If you’re uncomfortable, always consult a professional.
Safety First: Disconnect Power
Before beginning any repair, always turn off the power to the fan at the main circuit breaker. Do not rely solely on the fan’s switch. Use a voltage tester to confirm that the power is off before proceeding.
Replacing a Faulty Capacitor
This is a common repair for ceiling fans that run only on high or hum loudly without turning.
- Access: Depending on your fan, you may need to remove the light kit, fan blades, or lower housing to access the motor and capacitor.
- Locate the Capacitor: The capacitor is typically a rectangular or cylindrical component, often connected by several wires. Note the number of wires and their colors.
- Discharge (Crucial!): Capacitors can store a charge even after power is disconnected. Using a rubber-handled screwdriver, touch the metal tip across the capacitor’s terminals to discharge it safely. You might see a small spark.
- Disconnect: Take a photo of the wiring configuration before disconnecting. Carefully cut the wires leading to the old capacitor, ensuring you leave enough wire to work with.
- Match Specifications: Purchase a new capacitor that matches the microfarad (µF) and voltage ratings of the old one. These are usually printed on the capacitor itself. An incorrect capacitor can damage your fan.
- Install New Capacitor: Strip the ends of the fan’s wires and the new capacitor’s wires. Using wire nuts, connect the corresponding colored wires. Wrap each connection with electrical tape for added security.
- Reassemble and Test: Carefully tuck the wires and capacitor back into the housing. Reassemble the fan and restore power at the circuit breaker. Test all fan speeds.
 Close-up of hands replacing a faulty capacitor in a fan motor.
Replacing the Speed Control Switch/Resistor
This fix is often applicable to many types of fans with manual speed selectors.
- Access: For standing or desk fans, this might involve opening the base or motor housing. For ceiling fans with a pull chain switch, you’ll typically remove the light kit and the decorative housing around the switch.
- Disconnect: Similar to the capacitor, take photos of the wiring before disconnecting. Most switches will have wires labeled (e.g., L for Line, 1, 2, 3 for speeds).
- Remove Old Switch: Unscrew any mounting hardware holding the switch in place.
- Source Replacement: Find a replacement switch that matches the original’s rating (e.g., 3-speed, 4-speed) and wiring configuration.
- Install New Switch: Connect the wires to the new switch according to your photo or the new switch’s labeling. Ensure all connections are tight with wire nuts or spade connectors.
- Reassemble and Test: Reassemble the fan components and secure them. Restore power and test all speeds.
Fixing Loose or Damaged Wiring
Sometimes, the simplest issues are the hardest to find.
- Power Off: Again, ensure all power is off at the breaker.
- Locate Issue: After identifying loose or frayed wires during your initial inspection, carefully assess the damage.
- Repair/Replace: If a connection is merely loose, re-strip the wire end and use a new wire nut or connector to secure it tightly. If a wire is frayed or damaged, cut out the bad section and splice in a new piece of wire of the same gauge using appropriate connectors (e.g., butt connectors) and heat shrink tubing.
- Insulate: Ensure all repaired connections are properly insulated with electrical tape or heat shrink.
- Test: Restore power and test the fan.
When to Call a Professional
While many fan repairs are DIY-friendly, there are times when calling a professional is the safest and most practical option. If you encounter any of the following, consider seeking expert help:
- Uncertainty: If you’re unsure about any step, especially regarding electrical wiring or component identification.
- Motor Issues: If the fan motor smells burnt, makes unusual grinding noises, or the problem persists after replacing the capacitor or switch, it might indicate a more serious motor fault that requires specialized tools or knowledge.
- Complex Wiring: Fans with integrated smart features or complex control boards can be challenging to repair for an amateur.
- Safety Concerns: If you feel unsafe at any point, do not proceed. Electrical hazards are serious.
Preventing Future Fan Speed Issues (Maintenance Tips)
Regular maintenance can significantly extend your fan’s lifespan and prevent common problems.
- Regular Cleaning: Dust and debris can build up on fan blades, inside the motor housing, and on electrical components, causing overheating and premature failure. Clean your fan blades, motor vents, and grilles regularly. For ceiling fans, also clean the light kit.
- Avoid Over-stressing: Do not run your fan continuously on the highest setting for extended periods if it’s not designed for heavy-duty use. Give it breaks, especially during very hot weather.
- Proper Use: If your fan has multiple speeds, use them. Exercising the speed control switch occasionally can prevent contacts from corroding.
Buying Guide: Choosing a Reliable Fan
When the time comes to replace an old fan or purchase a new one, making an informed choice can prevent future frustrations.
Understanding Speed Control Mechanisms
- Mechanical Switches: Often found on simpler, older models, these use a physical switch that directly changes connections to various motor windings or internal resistors.
- Capacitor-Based Systems: Common in ceiling fans, these use capacitors to shift motor phases and reduce speed, offering smooth transitions.
- Electronic Controls (Solid-State): Many modern fans, especially those with remotes or digital displays, use electronic control modules. These offer precise speed adjustments but can be more complex to troubleshoot if they fail.
Features that Impact Durability
- Motor Quality: Look for fans with high-quality, durable motors (e.g., DC motors are often more energy-efficient and quieter, while AC motors are robust). Brushless motors tend to last longer.
- Component Quality: While harder to assess without disassembling, reputable brands generally use higher quality capacitors and switches that are less prone to early failure.
- Build Materials: Sturdy construction reduces vibrations, which can loosen wiring and stress components over time.
What to Look for in a New Fan
- Warranty: A good warranty indicates the manufacturer’s confidence in their product’s durability.
- Brand Reputation: Established brands often have better quality control and customer support.
- Energy Efficiency: Look for ENERGY STAR certified fans, which can save on electricity costs and often signify better component quality.
- Ease of Maintenance: Fans with easily removable grilles or accessible motor housings will simplify cleaning and potential repairs.
Comparison Table: Common Fan Components & Their Symptoms
| Component | Common Symptoms (Fan only on high) | Typical Solution |
|---|---|---|
| Capacitor | Lower speeds don’t work; fan hums but doesn’t start; slow start-up. | Replace with a matching capacitor (µF and voltage). |
| Speed Switch | Only high speed engages; switch feels loose/broken; no response on low/med. | Replace the entire speed control switch. |
| Blower Resistor | (Often in automotive or powerful general-purpose fans) Only high speed works; lower speeds fail entirely. | Replace the blower motor resistor. |
| Wiring | Intermittent speed changes; some speeds fail completely; visible fraying or loose connections. | Re-secure loose connections; repair or replace damaged wire segments. |
| Remote Receiver | Remote doesn’t change speeds, but manual controls (if any) might work; fan stuck on high. | Replace the remote control receiver module. |
Conclusion
A fan that only works on high speed can be a nuisance, but often, the fix is simpler than you might imagine. By systematically troubleshooting the speed control switch, capacitor, wiring, or remote receiver, you can usually pinpoint the culprit. Whether you choose to tackle the repair yourself by carefully replacing a faulty capacitor or switch, or opt to call in a professional for more complex issues, restoring your fan to full functionality is well within reach. Remember, proper diagnosis and adherence to safety protocols are paramount. Get ready to enjoy customized airflow once again, keeping your space perfectly comfortable.
What’s the most unusual fan problem you’ve ever encountered, and how did you solve it?
Frequently Asked Questions
My ceiling fan hums but doesn’t spin, or only spins slowly. Is the capacitor the problem?
Yes, a ceiling fan that hums loudly but doesn’t spin, or only spins very slowly, is a classic symptom of a faulty capacitor. The capacitor is crucial for initiating the motor’s rotation and providing the necessary phase shift for lower speeds. Replacing it with a new one matching the original’s microfarad and voltage ratings will likely resolve the issue.
Can I use any capacitor as a replacement for my fan?
No, you must replace a fan capacitor with one that has the exact same microfarad (µF) rating and an equal or higher voltage rating. Using a capacitor with an incorrect µF value can cause the motor to overheat, run inefficiently, or even be damaged, while a lower voltage rating could lead to premature failure of the new capacitor.
How do I know if my fan’s speed control switch is bad?
A fan’s speed control switch might be bad if it feels loose, doesn’t click into different positions, or if the fan only works on certain speeds (like just high) despite other components being functional. Sometimes, you might see visible scorching or melting on the switch itself if it has failed due to an electrical overload.
Is it safe to repair my fan myself?
Repairing your fan can be safe if you follow proper electrical safety precautions, especially disconnecting power at the circuit breaker and discharging capacitors. However, if you are uncomfortable with electrical work, lack the necessary tools, or cannot clearly identify the problem, it is always safer to consult a qualified electrician or appliance repair technician.
What causes fan resistors to fail?
Fan resistors, especially in motors with variable speeds, can fail due to age, constant exposure to heat, or excessive current draw caused by an aging or seizing motor. When a motor starts to pull too much amperage, it can overheat and burn out the resistor, leading to the fan only working on its highest speed, which often bypasses the resistor entirely.