Waking up to the familiar hum of an electric fan is one thing, but a persistent squeak or groan can quickly turn a refreshing breeze into an irritating nuisance. Over time, even the most reliable electric fans can develop an annoying noise, often signaling that their motor needs a little tender loving care. Don’t rush to replace it just yet; lubricating your fan’s motor is a common and often effective solution to restore its quiet operation and extend its lifespan. With a few simple tools and the right approach, you can bring peace back to your personal oasis.
 A person holding a noisy electric fan, contemplating lubrication to restore quiet operation.
Electric Fan Noise: Understanding the Cause
An electric fan’s primary function is to move air, and it achieves this through a motor that spins blades at high speeds. The most common culprit behind a noisy fan is usually a lack of lubrication in the motor’s bearings. These bearings allow the motor shaft to spin smoothly, and when they become dry, friction increases, leading to squeaking, grinding, or rattling sounds.
Dust and debris can also contribute to the problem by building up around the motor and bearings, further impeding smooth movement. Ignoring these noises can lead to more serious issues, such as increased strain on the motor, overheating, and even premature motor failure. Regular maintenance, including proper lubrication, is crucial for both extending the life of your fan and ensuring its safe, efficient operation.
Choosing the Right Lubricant for Your Fan Motor
Selecting the correct type of oil is paramount when lubricating an electric fan motor. Using the wrong lubricant can cause more harm than good, potentially damaging the motor windings or attracting more dust.
The golden rule is to use non-detergent oil. Many modern motor oils contain detergents designed to clean engine parts, which can be detrimental to electric motors. For fan motors, you need a lubricant that provides smooth, lasting performance without these additives.
- Recommended Options:
- 3-in-1 Electric Motor Oil (blue bottle): This specific formulation is designed for electric motors and is widely available.
- Zoom Spout Oil: Often found in hardware or HVAC supply stores, this brand is known for its long, flexible spout, making application easier. Ensure it’s for motors or turbines, not light “Lily White” or sewing machine oil which is too thin.
- SAE 15 or 20wt Non-Detergent Motor Oil: These weights are suitable for small electric motors and can often be found at automotive stores. Air tool oil is another viable non-detergent option.
- What to Absolutely Avoid:
- WD-40: While excellent for loosening rusted parts and preventing corrosion, WD-40 is not a long-term lubricant. It evaporates quickly and can leave a sticky residue that attracts dust, worsening the problem.
- Standard 3-in-1 Oil (black bottle): This often contains detergents not suitable for electric motors. Always look for the “electric motor oil” specification.
- Cooking Oils or Greases: These are not designed for the specific conditions of an electric motor and can gum up, solidify, or even become flammable.
Using the correct oil ensures proper lubrication, reduces friction, and allows your fan to run quietly and efficiently.
Step-by-Step Guide: Oiling Your Electric Fan Motor
Before you begin, remember that working with electrical appliances requires caution. Prioritizing safety will ensure a smooth repair process.
Safety First: Disconnecting Power
|
Our Picks for the Best Electric fan in 2026
As an Amazon Associate I earn from qualifying purchases.
|
||
| Num | Product | Action |
|---|---|---|
| 1 | Amazon Basics Air Circulator Fan, Desk Fan for Bedroom, Home and Office, With 90-Degree Tilt Head, 3 Speed Settings, Lightweight (3 LBS), 35 Watts, Black, 11.1"W x 6.3"D x 10.9"H |

|
| 2 | Viniper Portable Rechargeable Fan, Small Desk Fan : 3 Speeds & about 8-24 Hours Longer Working, 180 Rotation, Portable Desktop Fan Small but Mighty, Strong Wind (White, Light Black Blade)6.2 Inch |
|
| 3 | XPOWER FC-100S Multipurpose 11 Pro Air Circulator Utility Fan with Oscillating Feature |
|
| 4 | Amazon Basics 16" Pedestal Fan with Remote, Floor Fan, Standing Fan for Bedroom, Living Room, Office, with 3 Speeds, 3 Modes, Timer, Dual-Layered Blades, Adjustable Height, Tilt Head, 60W, Black |
|
| 5 | 10" Modern Standing Fan for Bedroom, Sleek Oscillating Pedestal Fan, 3-Speed & Height Adjustable Compact Floor Fan for Home Office & Dorm |
|
| 6 | Dreo Fan for Bedroom, 120° Oscillating Standing Fans, Quiet Floor Fan with DC Motor, 100ft Pedestal Fans for Room, 9 Speeds, 4 modes, 20dB, 120° Manual Vertical, 37-42" Adjustable Height, 9H Timer |
|
| 7 | Lasko 2520 Oscillating Stand Fan,White 16 Inch |
|
| 8 | LEVOIT Tower Fan for Bedroom, 25ft/s Velocity Standing Fan with 28dB Quiet for Sleep, Remoter, 12H Timer, 5 Speeds, 4 Modes, 90° Oscillation for Home, Office, Indoor, Bladeless 36 inch, White |
|
| 9 | Dreo Fan for Bedroom, 120° Oscillating Standing Fan, Quiet Floor Fan with DC Motor, Pedestal Fan for Room, 9 Speeds, 4 modes, 20dB, 120° Manual Vertical, 37-42" Adjustable Height, 9H Timer, Black |
|
| 10 | Dreo Tower Fan for Bedroom, 25ft/s Velocity Quiet Floor Fan, 90° Oscillating Fans for Indoors with 4 Speeds, 4 Modes, 8H Timer, Standing Fans, Bladeless Fan, Black, Nomad One (DR-HTF007) |
|
Absolutely crucial: Before touching any part of your electric fan, make sure it is completely unplugged from the power source. Do not rely solely on turning it off at the switch. This prevents accidental startup and reduces the risk of electric shock.
Gathering Your Tools
You won’t need a professional workshop to oil your fan. Here’s what you’ll typically need:
- Screwdrivers (Phillips and flathead, various sizes)
- A small applicator bottle with a fine tip (or the spout of your chosen oil)
- Clean rags or paper towels
- A soft brush or compressed air for cleaning dust
- Your chosen non-detergent electric motor oil
Disassembling Your Fan
The process of disassembly varies slightly depending on your fan type (pedestal, box, tower), but the general steps are similar:
- Remove the Grille: Unscrew or unclip the front grille, followed by the fan blade nut (which is often reverse-threaded – turn clockwise to loosen).
- Remove the Blades: Carefully pull the fan blades off the motor shaft.
- Remove the Rear Grille/Motor Cover: Detach the rear grille. You may need to remove additional screws to access the motor housing. For some fans, the entire motor housing needs to be opened to reach the bearings. Take photos as you go to remember how to reassemble everything.
Locating the Oiling Points
Once the motor is exposed, look for the bearing points.
- Older Fans: May have small oil holes (sometimes with caps) on the top of the motor housing. These are designed for periodic lubrication.
- Newer Fans: Often lack dedicated oil ports. In these cases, you’ll need to locate where the motor shaft enters the motor housing on both the front and back sides. These are the bearing points that need lubrication. There might be felt washers around the shaft that absorb the oil.
Applying the Oil Correctly
- Clean First: Use a soft brush or compressed air to remove any accumulated dust and grime from around the motor shaft, bearings, and oil holes. A clean surface helps the oil penetrate properly.
- Apply Sparingly: Using your applicator, apply just a few drops of the non-detergent electric motor oil directly into any oil holes. If there are no holes, apply a few drops to the motor shaft where it enters the motor housing at both the front and rear bearings.
- Allow Absorption and Rotate: Let the oil soak in for a few minutes. You can gently spin the fan shaft by hand to help distribute the oil throughout the bearings. You might need to add a few more drops until the oil appears to have fully penetrated.
- Avoid Windings: Be careful not to get oil on the motor’s electrical windings. Oil on the windings can degrade their insulation and potentially lead to motor failure or safety hazards. Wipe away any excess oil immediately with a clean rag.
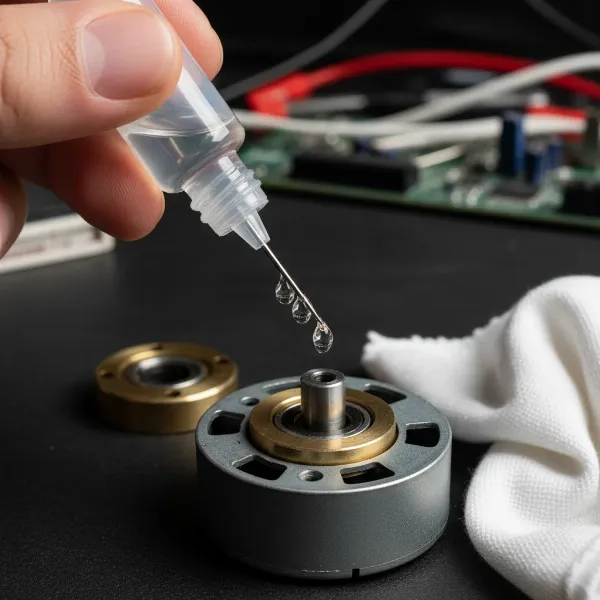 Close-up of a hand applying non-detergent oil to an electric fan motor bearing.
Reassembling Your Fan
Once you’ve oiled the motor, reverse the disassembly process. Ensure all screws are tightened, the fan blades are securely attached (remembering any reverse threads), and the grilles are properly aligned. Double-check all connections before plugging the fan back in.
Beyond Oiling: General Fan Maintenance Tips
Oiling your fan motor is a great step, but it’s part of a broader maintenance routine that can keep your fan running smoothly and quietly for years.
Regular Cleaning
Dust is an electric fan’s archenemy. It coats blades, clogs grilles, and insulates the motor, making it work harder and hotter.
- Blades and Grilles: Wipe down fan blades and grilles weekly or bi-weekly with a damp cloth to prevent dust buildup. For stubborn grime, a mild soap solution can be used.
- Motor Housing: Every few months, or when you notice performance issues, disassemble the fan to clean the motor housing and internal components with a brush or compressed air.
Checking for Loose Parts
Vibrations from a running fan can loosen screws and connections over time, leading to rattling noises.
- Tighten Fasteners: Periodically check and tighten all visible screws, especially those holding the motor, stand, and grilles together.
- Blade Balance: Ensure fan blades are not bent or warped, as this can cause imbalance and vibration.
Proper Storage
When the cooling season ends, proper storage can prevent damage and dust accumulation.
- Cover It Up: Store your fan in a dry, clean place, preferably covered with a sheet or in its original box, to protect it from dust and moisture.
- Elevate If Possible: Keeping it off the floor can further minimize dust exposure.
When to Consider Professional Help or Replacement
While oiling and basic maintenance can resolve many fan issues, there are times when it’s best to seek professional help or consider a replacement.
- Persistent Noise After Oiling: If the noise continues even after thoroughly cleaning and oiling the motor, the bearings might be worn beyond simple lubrication, or there could be another internal mechanical issue.
- Other Motor Issues: Overheating (the motor feels excessively hot to the touch), a burning smell, sparks, or erratic operation are serious signs that the motor is failing. In these cases, continued use can be dangerous.
- Age of the Fan: Older fans, particularly those that have seen heavy use, eventually reach the end of their functional lifespan. While a nostalgic piece, the cost of extensive repairs might outweigh the cost of a new, more energy-efficient model.
Buying Guide: What to Look for in a New Fan
If your old fan has truly breathed its last, or if you’re in the market for an upgrade, consider these factors to choose a quiet and reliable model:
Noise Levels (dB Ratings)
Many manufacturers now provide decibel (dB) ratings for their fans. Look for models with lower dB levels, especially if you plan to use the fan in a bedroom or quiet living space. Fans with DC motors often operate more quietly than traditional AC motors.
Maintenance Features
Some modern fans are designed with sealed bearings that require no oiling, offering maintenance-free operation for their lifespan. Others may have easily accessible parts for cleaning. Consider how easy it is to disassemble for cleaning.
Energy Efficiency
Look for fans with energy-saving features or high efficiency ratings. While fans generally use less electricity than air conditioners, an efficient model can still save on long-term operating costs. Features like multiple speed settings, timers, and “eco” modes can also contribute to efficiency.
Oiling your electric fan motor can breathe new life into a noisy appliance, saving you money and reducing waste. By understanding the cause of the noise, choosing the right lubricant, and following careful steps for disassembly and application, you can enjoy a quieter, more efficient fan once again. Regular cleaning and attention to your fan’s condition will ensure it continues to provide a comforting breeze for many seasons to come.
Frequently Asked Questions
What kind of oil should I use for my electric fan motor?
You should use a non-detergent electric motor oil, such as 3-in-1 Electric Motor Oil (blue bottle), Zoom Spout oil specifically for motors, or SAE 15/20wt non-detergent motor oil. Avoid standard motor oils with detergents, WD-40, or thin sewing machine oils, as they can damage the motor.
How often should I oil my electric fan motor?
The frequency depends on usage, but a general guideline is to oil your Electric Fan motor every few months of consistent use. If you notice it starting to make unusual noises or spinning slower, it’s likely time for re-lubrication.
Can I use WD-40 to lubricate my fan motor?
No, you should not use WD-40 to lubricate your fan motor. WD-40 is a penetrating fluid and water displacer, not a long-lasting lubricant. It evaporates quickly and can leave behind a sticky residue that attracts dust, ultimately worsening the problem and potentially damaging the motor.
My fan is still noisy after oiling, what should I do?
If your fan remains noisy after proper cleaning and oiling, the bearings might be excessively worn and require replacement, or there could be another mechanical issue. Check for loose blades, unbalanced components, or obstructions. If the noise persists, it might be time to consult a professional or consider replacing the fan.
How do I know if my fan motor needs oil?
The most obvious sign is unusual noise, such as squeaking, grinding, or rattling, which indicates increased friction in the bearings. Other signs include the fan running slower than usual on a given setting, or the motor feeling hotter than normal, as lack of lubrication causes it to work harder.